How to replace a defective Hard Disc in a Virtualised TrueNAS on Proxmox environment ?
Posted on September 15, 2024 (Last modified on November 4, 2025) • 8 min read • 1,589 wordsThis article describes how to replace a defective TrueNAS pool disc in a TrueNAS virtualised on Proxmox environment.
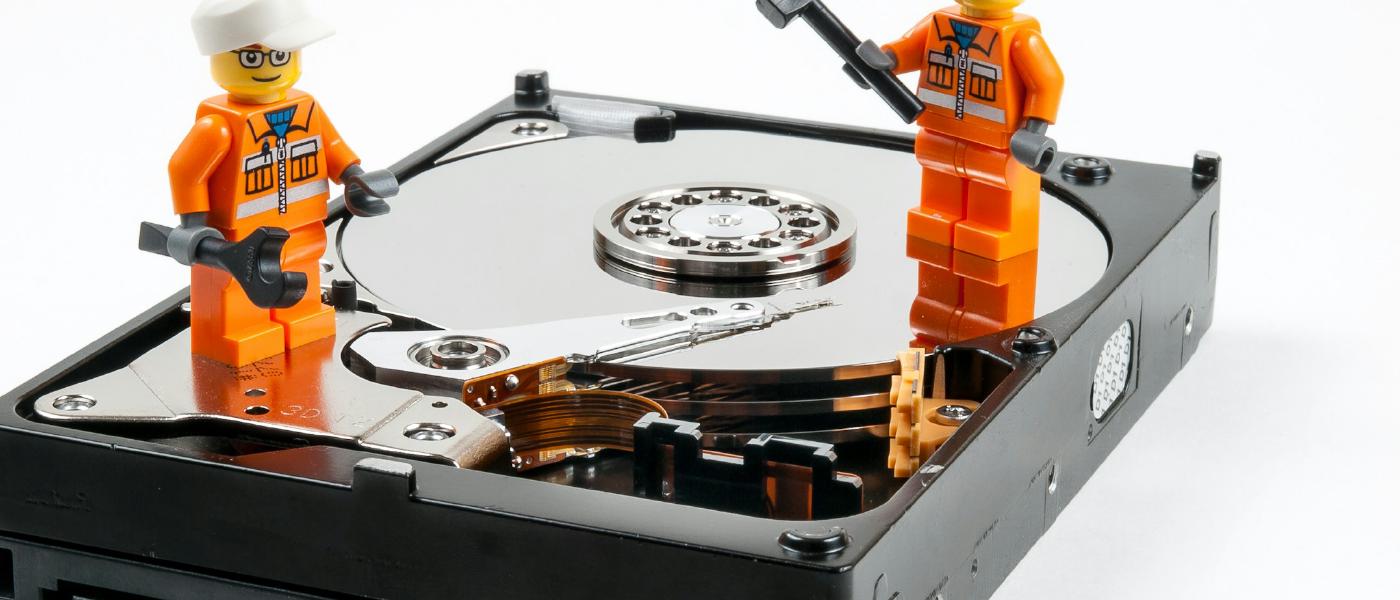
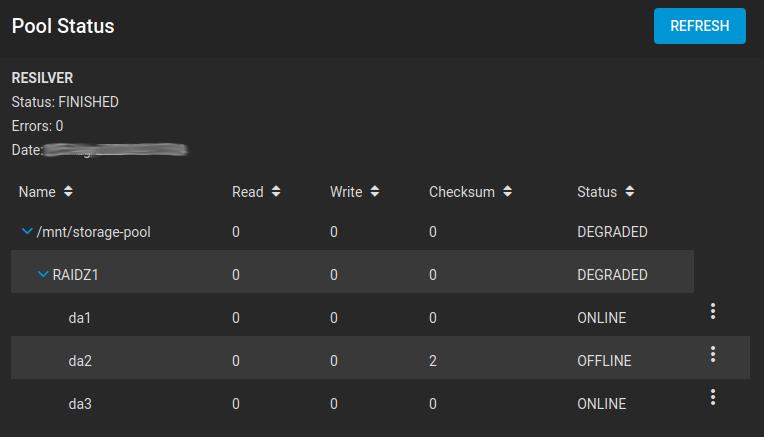
Some time ago, the dashboard of my backup NAS alerted me to a problem in the storage pool. Instead of the regular pool status ‘ONLINE’, the pool status ‘DEGRADED’ was now reported, along with a friendly message sign.
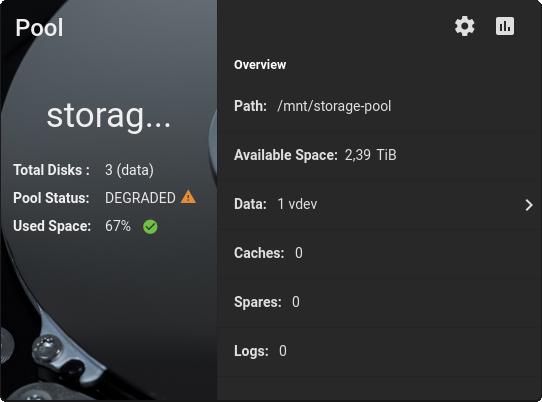
On closer inspection, the status page of the pool did not show any read or write errors, but it did show errors in the calculation of the checksums. The system is set up so that the entire pool is scrubbed every four weeks, i.e. all pools are checked. I assume that the errors were detected during one of these tests. (although I got 48 errors a few days before I took the screenshot - cause unclear)
If the ZFS file system used by TrueNAS has already detected a problem, it’s time to give it some thought.
Starting Situation
- HPE MicroServer GEN 10 Plus, 40GB ECC RAM-memory
- no hot-swap, discs can’t be replaced during the running system
- Proxmox (8.2.4) as host operating system
- On top virtualised TrueNAS Core (TrueNAS-13.0-U6.1)
- 3x 4TB SATA-Discs passed through TrueNAS VM
- TrueNAS Storage-Pool (RAIDZ1) based on these discs is in DEGRADED mode
- One of the discs shows checksum-errors
Even before I had fully thought through the decision to replace the defective hard drive, I remembered that I had virtualised TrueNAS on Proxmox. Who thinks about replacing a hard drive when you’re putting together a home server? Let’s see if we can replace the hard drive without throwing all the drive mappings into the blender.
What is the Plan?
To replace a hard drive of a ZFS RAID array, as used with TrueNAS, you need at least a replacement hard drive with the same or a larger capacity. The system under consideration here is the backup NAS in the home network (a NAS with RAID is not a backup) and continuously fills up with all kinds of data. For this reason, I am taking the opportunity to increase the overall capacity in the long term. For this reason, I have chosen an 8TB hard drive as a replacement.
The total capacity of a ZFS RAIDZ array is determined by the single disc with the smallest capacity:
| Disc Capacity | RAID Type | Usable Capacity |
|---|---|---|
| 3x 4TB | RAIDZ1 | ~7TB |
| 2x 4TB + 1x 8TB | RAIDZ1 | ~7TB |
| 3x 8TB | RAIDZ1 | ~15TB |
This means that all three discs must be replaced before a higher usable capacity can be achieved. Therefore long term. But at least the TrueNAS documentation says that the pool capacity is automatically expanded as soon as this is possible. (I will report back…)
What you should look out for
If you accidentally replace a hard drive that is still working, the RAID pool remains usable on paper. However, during the intensive resilvering process (recovery), which can take many hours, the already damaged hard drive could start showing errors or even die.
The new hard drive is not yet fully integrated, another hard drive has now failed and only one is left, but it does not hold all the data of the pool. At this point, the pool and its data is lost.
So if you operate RAID pools with the minimum number of disks for cost reasons, or only have one parity disk in the pool (RAIDZ1), you simply have to take a closer look. Perhaps you should also react more timely, not to jeopardise the health of the pool and its valueable data.
Replacement Process
- Take defective disc of storage-pool “offline”
- Wait until pool-status shows “offline” for that disc
- Switch off TrueNAS VM
- Gather serial number of defective disc
- Remove defective disk via TrueNAS VM options
- Power down system (Proxmox-server)
- Remove defective disc physically from the system (doublecheck with serial number of defective disc)
- Note down serial number of new disc and plug it into the system
- Power on system (Proxmox-server)
- Check, if new disc is detected (doublecheck with serial number of new disc)
- Passthrough new disc to TrueNAS VM
- Switch on TrueNAS VM
- Integrate new disc into the storage-pool
- Wait until Resilvering-process has finished
1. Take defective Disc of Storage-Pool “offline”
The TrueNAS documentation strongly recommends that the defective disc should first be removed from the pool. Negative effects could be a significantly slower rebuild of the pool.
In TrueNAS: Storage -> Pools -> Gear-symbol -> Status to show pool-status.
Press the three-dots-menu of the disc to be replaced, then selectOFFLINE, confirm and press OFFLINE.
The disc is now being logically removed from the pool.
TIP
If the process fails, e.g. with “Disk offline failed - no valid replicas”, it is suggested to run scrub first and try again.
2. Wait until Pool-Status shows “offline” for that Disc
Sometimes it takes a moment but then the status of the disc should change to ‘OFFLINE’.
3. Switch off TrueNAS VM
Switch of TrueNAS via its Web-GUI.
4. Gather serial number of defective disc
First we take a look at the pool status (see 2.) and see that the offline disc has the name da2. The system disk has the name da0, so our defective disk is the 3rd disk in the list.
Proxmox keeps a list of the hard disks of each virtual machine. In this case, select the VM of the TrueNAS Backup-NAS, then Hardware and look at the list of hard disks that Proxmox uses for this VM. scsi:0 is the virtualised system hard disk and scsi:1 - scsi:3 are the RAID array hard disks.

Alternatively, you can also call up the configuration of a VM in the Proxmox shell
qm config <vmid>
The serial number of the disc can be found as part of the disc name, in this case ZDH8R8B4.
5. Remove defective disk via TrueNAS VM options
To switch off the system in an orderly state, remove the scsi:2 hard disk via the hardware settings of the VM. Select Select hard disc and Detach.

6. Power down system (Proxmox-server)
After any VMs or LXCs that may still be running have been stopped, the Proxmox computer can now be powered off.
7. Remove defective Disc physically from the System (doublecheck with serial number of defective disc)
The defective disc can now be identified using the previously noted serial number and removed from the system.
8. Note down Serial Number of new Disc and plug it into the System
As long as the capacity of the new hard drive does not differ from the others, it is a good idea to make a note of the serial number of the new hard drive so that it can be recognised later in the running system. In my case WSD9DT7R.
9. Power on System (Proxmox-server)
Now it’s time to power on the Proxmox-server again.
10. Check, if new Disc is detected (doublecheck with serial number of new disc)
First, the new disk must be recognised by Proxmox. To test this, you can look at the list of system disks in the Proxmox shell:
ls -l /dev/disk/by-id
As expected, the new hard drive can be found in the third hard drive slot (
sdc) based on the serial number or type name (ST8... instead of ST4...). Of course, this is only the case in my setup.
11. Passthrough new Disc to TrueNAS VM
The new disc must now be passed through to the TrueNAS VM. This can be done in the Proxmox shell, for example. To do this, you need the ID of the virtual machine (vmid), the name/number that the disk should have in the VM (hdname) and the complete name of the Proxmox system disk as it was output in the last step (disk name by ID).
qm set <vmid> -<hdname> <disk name by ID>
In my case that’s
qm set 204 -scsi2 /dev/disk/by-id/ata-ST8000VN004-2M2101_WSD9DT7Rscsi:2, because that has been the name of the virtual disc that has been removed before.
12. Switch on TrueNAS VM
By starting the TrueNAS VM, you are already on the home straight.
13. Integrate new Disc into the Storage-Pool
The remaining steps are carried out via the TrueNAS GUI in the web browser
-
Call up TrueNAS in the browser
-
Call up pool status
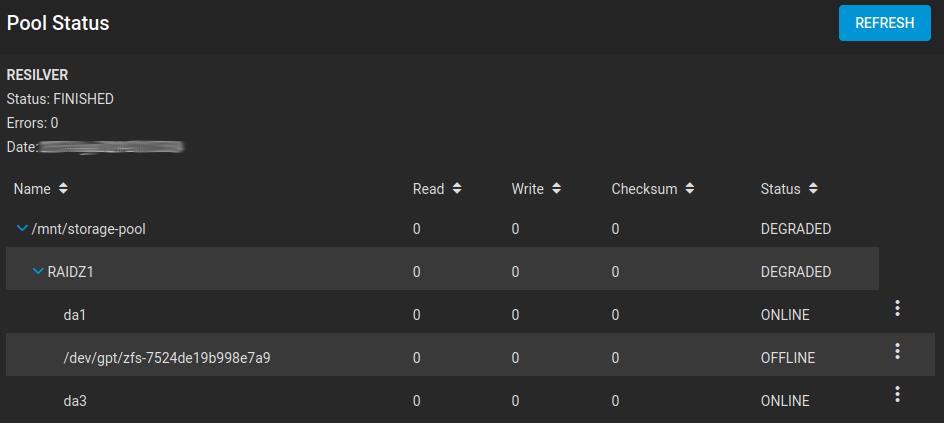
Storage -> Pools -> Gear -> Status.As the storage pool is missing a disc, it is displayed as OFFLINE with an internal ID.
-
Now select the three-dot menu next to the hard drive displayed as “OFFLINE” and select ‘Replace’
-
In the dialogue that appears, the hard disk that is to be used for the vacant position in the pool is selected. The list only contains a selection of hard disks that TrueNAS has recognised but not yet assigned to a pool. If you wish, you can force the deletion of the disc by ticking the ‘Force’ box.
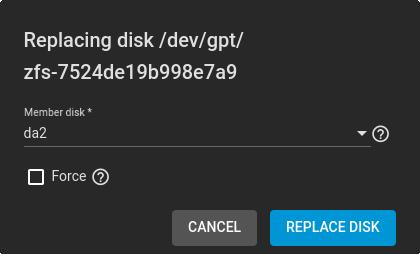
If the ‘Force’ checkbox is not selected, the process may fail if there are partitions or data on the disc. In this case, ‘Force’ can be selected to completely delete the new disc before mounting.
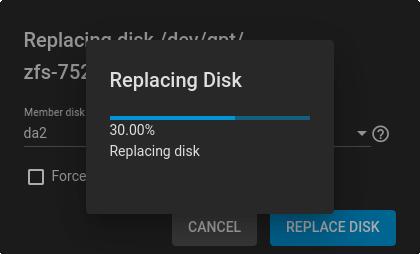
… shortly after

-
The resilvering process starts automatically.
Depending on the size of the pool, this process can take a very long time. In my case, estimates of over 4 days were issued in the meantime. This seems to be normal at the beginning, while mainly meta data of the pool is being processed. After a few hours the prediction shortened and in the end everything was done in 1 day and 10 hours.
-
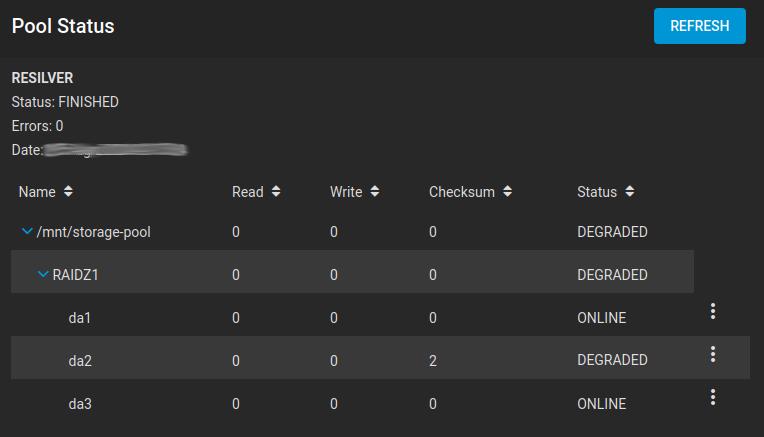
After completion of the process, the pool goes into “ONLINE” status.
