TrueNAS - virtualised with VirtualBox
Posted on August 2, 2024 (Last modified on November 4, 2025) • 5 min read • 928 wordsWhy put money aside for hardware to try out a NAS with a RAID array when you can simply virtualise the (True)NAS ?

Serie TrueNAS
This is an article in the series TrueNAS - a NAS for your Homelab
It seems obvious that a Homelab needs central data storage, but getting a computer, including SSDs, with 4 or 5 large hard drives just to try out what ZFS, data pools, data sets or Samba shares are all about is not at all.
If you can find a Linux/Windows computer in your home network that has ~16GB of RAM and >100GB of free hard disk space, I say ‘Hold on!’ and let’s virtualise it.
TrueNAS as Virtual Instance in VirtualBox
An essential part of the fun and complexity of network-attached storage (NAS) is the use of multiple hard drives in a RAID array. To virtualise this, I will use the open source software VirtualBox, as e.g. Canonical-Multipass does not currently support multiple virtual hard disks.
If you are already using other virtualisation software, you can of course also use this. VirtualBox is definitely a good choice for beginners.
Prerequisites for Virtualisation
- A not too old computer with x86/x64 architecture
- Windows or Linux
- More than 12GB RAM (as TrueNAS requires 8GB for installation)
- An internal/external hard drive with about 8GB + 4*20GB = 88GB free space
- Software that can virtualise a computer - VirtualBox
Installing VirtualBox
First you download the virtualisation software VirtualBox for your own operating system (of the computer on which the VM is to be installed) from the VirtualBox download page and install it
- in my case this is for Ubuntu Linux
- installing it with
sudo apt install ./virtualbox-<VERSION NUMBER>_amd64.deb.
File -> Preferences -> General you can specify the drive or path in which the virtual machines (VM) are to be installed. This is particularly useful if the boot drive no longer has any free space.
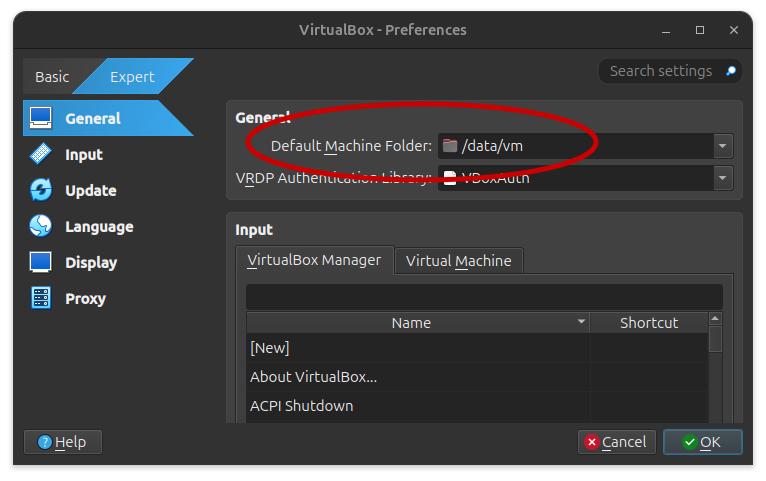
In my case, /data is the mount point of another internal hard drive.
Assembling a TrueNAS VM
Everything starts with the creation of a new virtual machine with the minimum resources required for TrueNAS.
-> New (blue star) or Menu -> Machine -> New.
Inputs for the individual categories:
Name and Operating System
- Name: TrueNAS
- Type: Linux
- SubType: Other Linux
- Version: Other Linux (64-bit)
Hardware
- Base Memory: min. 8GB
- Processors: min. 1
Hard Disk
- Size: ~8 GB
- Hard Disk File Type: VDI
The specified hard drive represents the TrueNAS boot device.
Now set the network correctly so that the VM can obtain its own IP address in the home network
-> Setting -> Network -> Adapter 1
- Attached to: Bridged Adapter
Now the data disks for the RAID array are still missing. We can create mirrored or striping RAID arrays with TrueNAS, but here we want to try out the common case of a RAID 5 or RAID-Z1 array. A minimum of three disks are required for this, in order to have a little more flexibility when playing around (e.g. 2x2 mirror or Raid-Z2) we will simply use four.
The virtual hard disks are created as individual files in the VM folder.
-> Tools -> Media -> Create
-
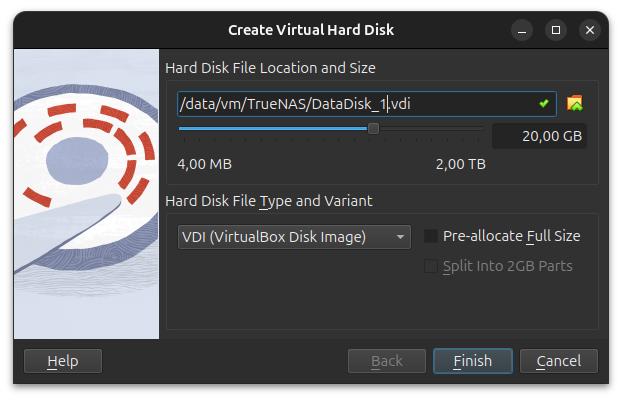
We place the file in the TrueNAS VM directory and name the disk e.g.
DataDisk_1.vdi. -
20 GB per disk is sufficient for experimentation, but you can of course create larger ones
-
A tick at
Pre-allocate Full Sizewould immediately occupy the full hard disk space on the guest system, without it the files grow during operation when data is written. Since performance is not a requirement in this case, we can use our resources sparingly and not tick the box.
-
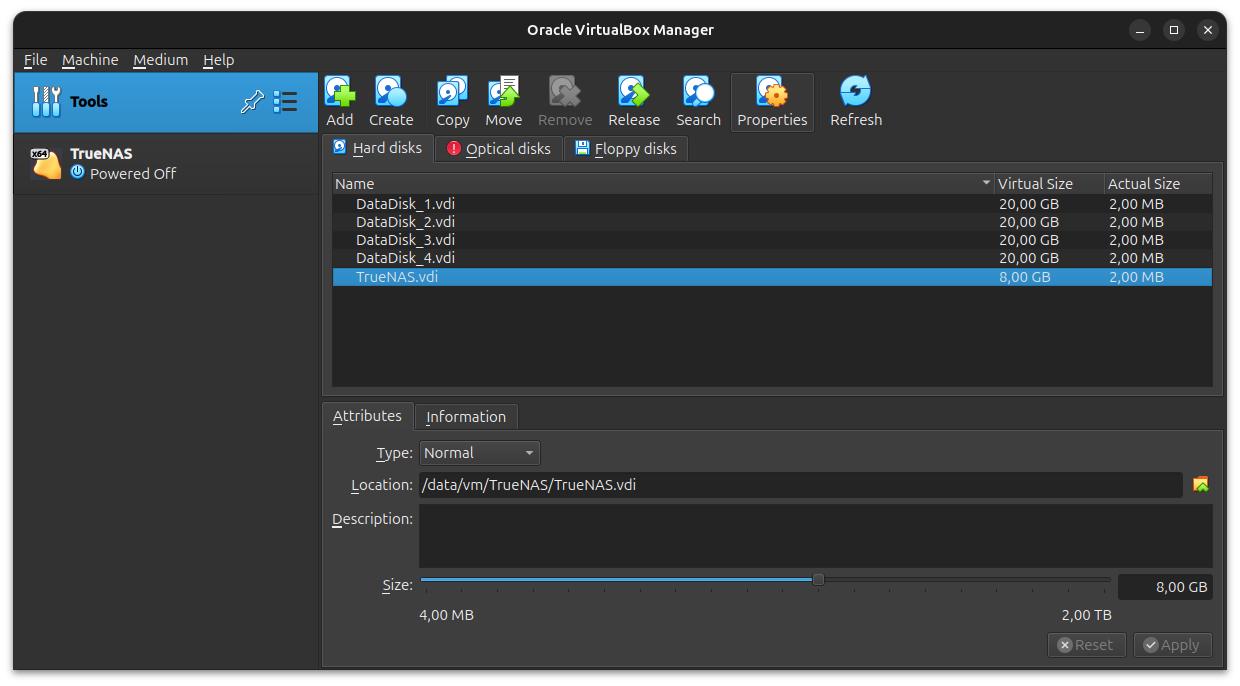
Repeat this process until all four virtual hard disks have been created.
The result should then look something like this (see screenshot), showing the slightly smaller boot disk and the four data disks.
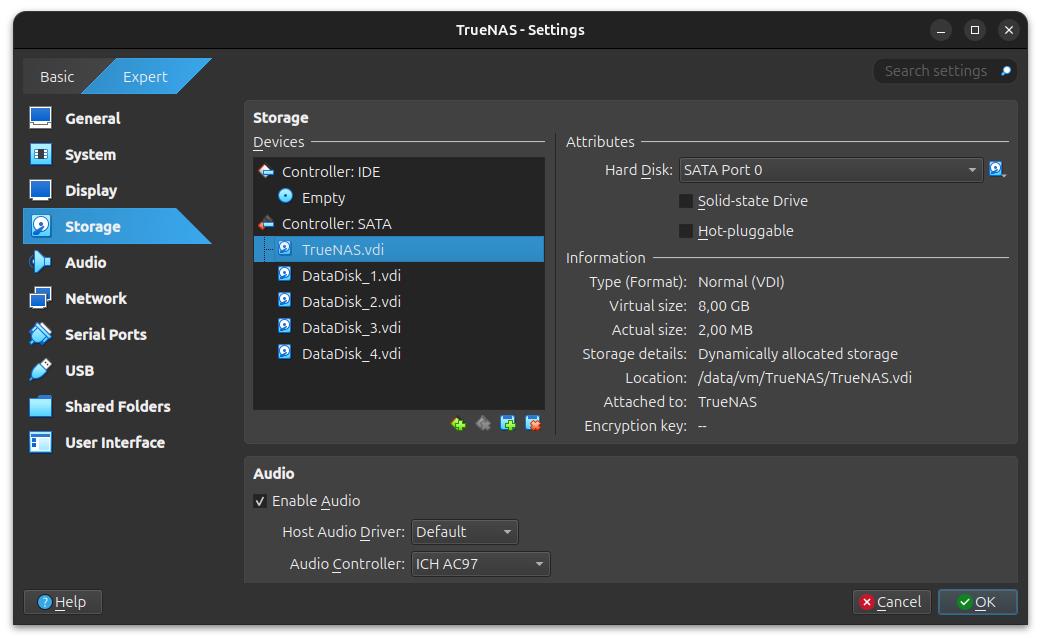
The four data disks are still sitting on our virtual table. They now need to be installed in the virtual computer. To do this, call up the settings for the storage system of the VM.
TrueNAS -> Settings -> Storage
- Add the disks one after the other next to the boot disk
The disks are added as SATA devices and made available according to the operating system of the VM (in this case TrueNAS).
Installing TrueNAS as a VM
First, we browse to
TrueNAS,
select the TrueNAS Community Edition and download the Linux-based TrueNAS scale as an ISO image. I recommend the stable version.
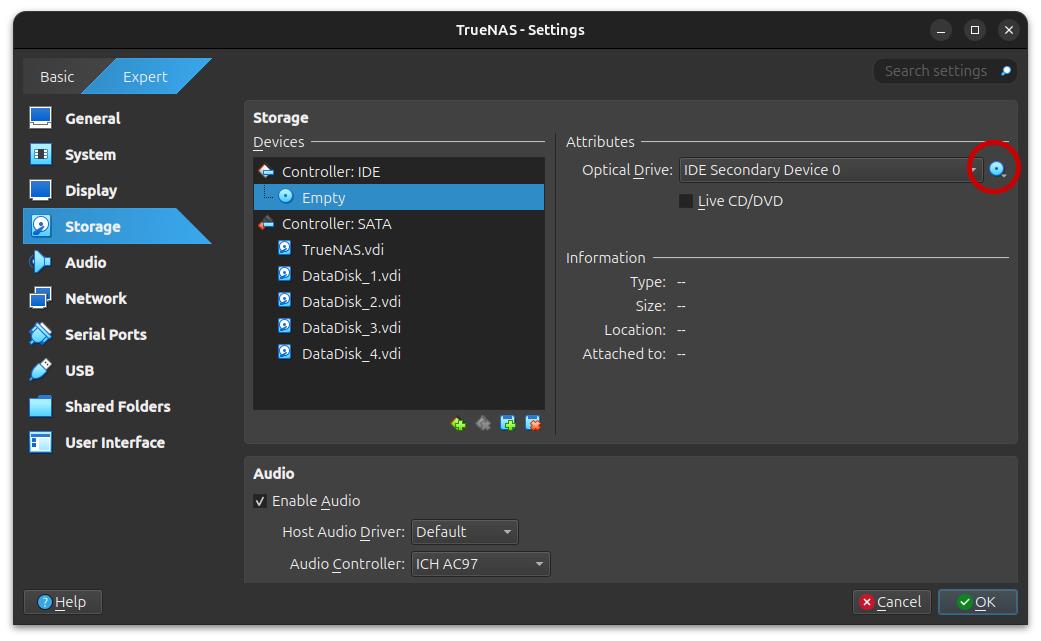
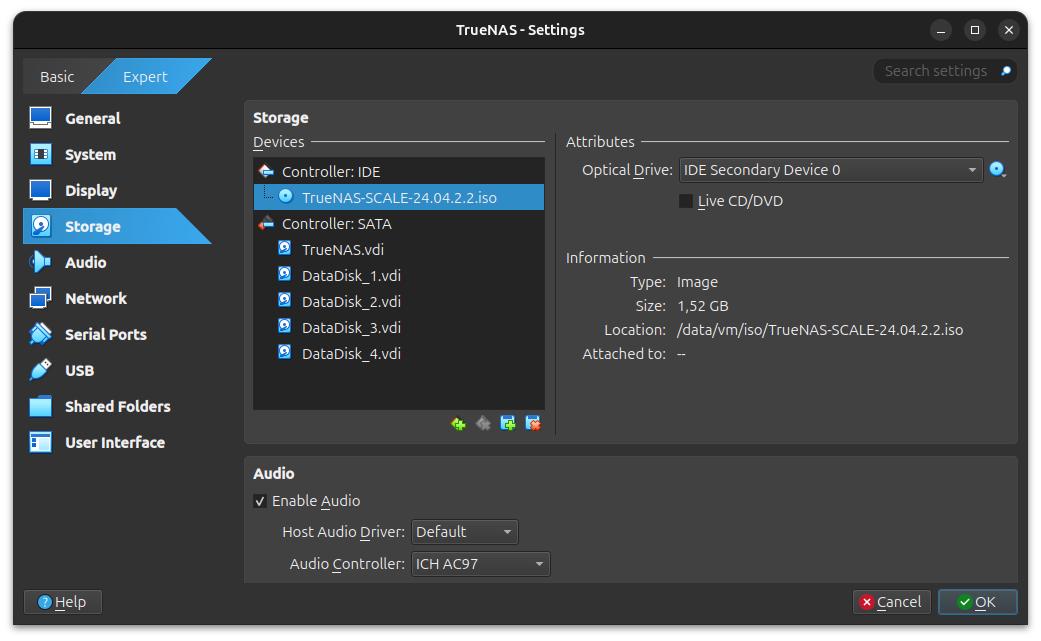
The ISO image is then inserted into the virtual optical boot drive of the VM we have just created. To do this, we also switch to the properties of the VM’s storage system.
TrueNAS -> Settings -> Storage
-
Select the empty DVD drive on the IDE controller and open the corresponding dialogue (see red circle in the screenshot)
-
and enter the location of the previously loaded TrueNAS ISO image.
-
The virtual computer can now be started
TrueNAS -> Start
From now on, the further installation of TrueNAS no longer differs in whether it is real hardware or a virtual machine. I further describe how TrueNAS is installed, how pools and data sets are created in Installation of TrueNAS.